![]()
|
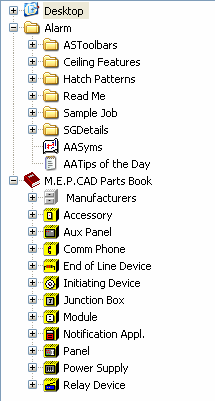
To view the Parts Tree, access the View Menu/Toggle Parts Tree. Drag the tree to a desired location in the workspace. When it is located to the left or right of the drawing, increase or decrease the drawing area by moving the Parts Tree's vertical border horizontally as desired. The opposite applies when it is placed above or below the drawing: move the horizontal border vertically as desired to increase/decrease the drawing area. Details DialogThe Details Page contains the Desktop files, Parts Book list, along with recently-saved drawings, Ceiling Features, Crosshatch Patterns, and sample jobs. Parts can be moved from the drawing into a folder within the Parts Tree. Store parts for future use by dragging them from the drawing into a Parts Tree folder in much the same way files are stored in folders with Windows Explorer.
Customize a New Folder
Drag parts from the drawing directly into a new folder for future use. For quick viewing and reference, a thumbnail view of the part will display at the bottom of the Parts Tree. Related Topics:Parts Database: Modify Existing Item
|
![]()
 The
The.gif) Create a new, customized folder,
perhaps under AlarmCAD's main folder (or whatever desired location), by
right-clicking the folder and selecting
Create a new, customized folder,
perhaps under AlarmCAD's main folder (or whatever desired location), by
right-clicking the folder and selecting