|
|
|
AutoSPRINK Training Site - Creating a Plot Sheet, Plotting & Printing
|
First we need to set up a Plot Sheet for our Title Block to go on. This may not be required but it is a good idea to separate as many elements from the drawing as you can. Go to the menu bar and click on "File" then click on "New Plot Sheet"

Then go to "File" then click on "Plotting" then "Page Setup..."
enter in the information – Page Size , such as D size =
width 36”, height 24” – Margins, this is the dotted line that shows your plan print
area (like a view box). Areas outside this area will print from the Plot Sheet (cap
ext.). Select the Render tab – set Surface Tessellation around 60, you may
adjust this higher or lower depending on the size of you plot and type of plotter.

The drawing surface you now have is the same as in AutoSPRINK cad files; the
only difference is that you are drawing in inches. You may now create your Title
Box, or import a previous one from an AutoCAD file. Remember to adjust your
margins to fit your plan in the drawing.
When you import a dwg file into AutoSPRINK’s Plot Sheets, remember that the
benchmark needs to be in the lower left corner. Often times the import drawing
may be in paper space and you will need to select this option for elements to
appear on the drawing surface. Once imported you may need to make some
adjustments, such as line widths, text fonts and general clean up of your plot
drawing (Title Box). After complete, delete the empty layers – go to "Window",
and then select "Clean House...", this will purge your drawing and make the file as small as
possible. Save your file, recommend building a file for plot sheets and to be
used as a template for your drawings.

Applying Plot Sheet to your drawing:
Open Drawing – "File", "Open" – Drawing (Ctrl+O)
Go to "File", "Plotting", "Page Setup..." then on the "Page Styles" tab, click on the "Properties" button, then on the "Position and Scale" tab - fill in the information that you wish for this
drawing

Go to "Sheet" tab – click on Browse to find a Plot Sheet from a folder that you wish to use.
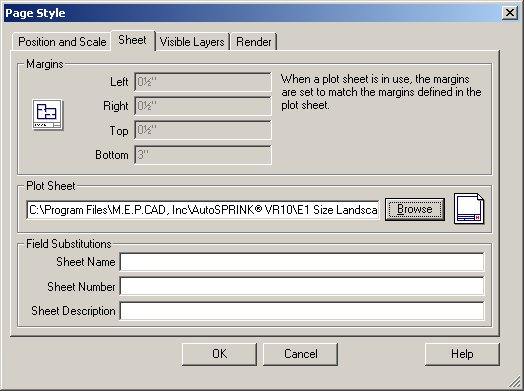
Go to "Visible Layers" tab and then click on "Capture Drawing Settings" button – this will
give you an additional opportunity to shut off any layers you may want to print.
Select the "Render" tab and set the Surface Tessellation at around 60, you may
have to adjust this depending on the size of the drawing file and your Plotter. Click "OK"
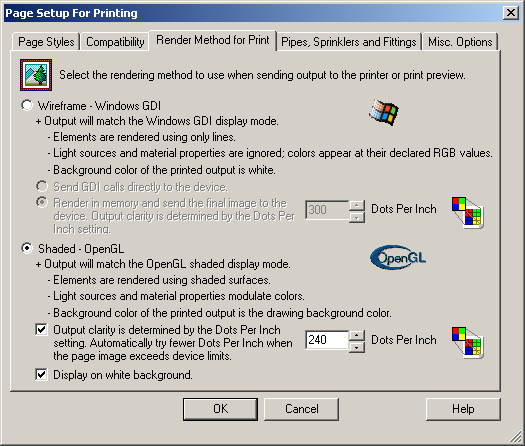
Return to Page Setup for Printing – "Render Method to Print" tab and select Open GL –
normal you can set the dpi around 240 (news print is at 150) so anything that you can
get greater than that will do a good job – again this will depend on your plotter (refer to
the plotter manufactures instruction manual.
Click "OK"
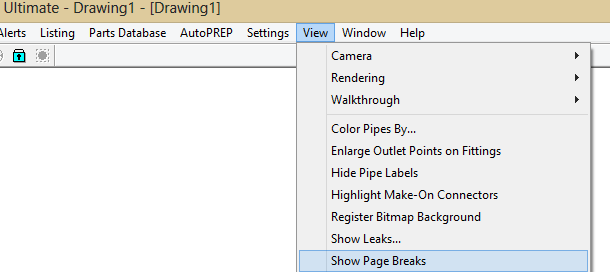
Then go to "View" then click on "Show Page Breaks" to show print margins.
To change print size: click on "File" then "Plotting" then click on "Printer Setup…"

Then click the "Properties" button the click the "Advanced" button on the "Paper/Quality" tab then change the "Paper Size"

Go to "File", "Plotting" and either "Preview" (preview time is the time that the plotter
spools your drawing) or "Print".
Back To Training Menu
|
|
|