![]()
 The Circuit Properties page
is a complex informational hub, and each dialog box is explained below
in more detail. To view a topic within the Circuit
Properties page, click on the link below:
The Circuit Properties page
is a complex informational hub, and each dialog box is explained below
in more detail. To view a topic within the Circuit
Properties page, click on the link below:
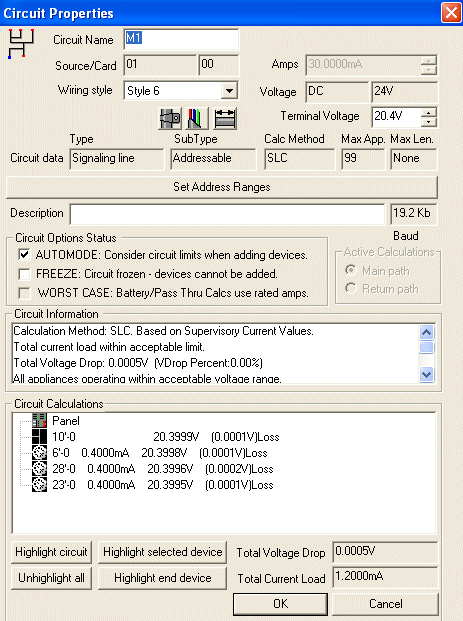
At the top, The Circuits's Name is shown in the field, which is derived from its assigned address in the drawing. The Name field is editable, and any changes will affect labels in the drawing as well.The circuit's Source/ Card number are referenced here as well for the user. In the image, the Circuit Name field displays an M, which indicates an addressable signaling line circuit. SIG would indicate a notification circuit. AUX would indicate an auxiliary power circuit.
Depending on the Circuit type selected from the Parts Database, several wiring styles may be available from the drop-down menu to further define the Circuit.
Below the Wiring Style field, the Conduit,
Cable and Length icons ![]() allow users to define the circuit's
conduit, cable
and length properties, if applicable.
allow users to define the circuit's
conduit, cable
and length properties, if applicable.
Please Note: When the circuit's type or subtype has not previously been defined and when no appliances are attached to the circuit (circuit is unused), then the Cast button will be accessible from the Circuit Properties Page, as in the image below:
![]() .
.
In the large dialog box above, that particular circuit's type and subtype had already been defined respectively as Signaling Line and Addressable, so the Cast button is not visible. For additional information about Circuit Casting, click on the Cast/Conduit/Cable/Length icon's image directly above.
The maximum amperage (for some circuits maximum Wattage) value is displayed for the user in the upper right side of the Circuit Properties page.
Amperage (for some circuits this is the Wattage field) and Voltage fields may be read-only fields, depending on the user's input in the Parts Database. For instance, any circuits that were 'cast' as they were placed in the drawing will cause one or both fields to be read-only and not editable.
![]() When circuits aren't previously
'cast,' the Terminal Voltage field
is editable, as shown in the right image. Default terminal voltage is
set at 24V.
When circuits aren't previously
'cast,' the Terminal Voltage field
is editable, as shown in the right image. Default terminal voltage is
set at 24V.
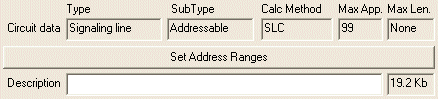 Circuit Data fields are derived from the Wire Path
Properties page, and are displayed for reference only, not for editing.
Circuit Data fields are derived from the Wire Path
Properties page, and are displayed for reference only, not for editing.
If applicable, users may select the Set Address Ranges button to define appliance address ranges for Initiating Devices and Modules on the circuit. The entire starting and ending addresses of these two devices can be identified.
Users enter a unique Description for the circuit in the corresponding field, if desired. Next to the Description field is the circuit's Baud rate, listed in Kilobits, which is displayed as a reference only.
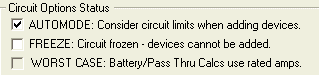 These options are based upon
users' input into the Parts Database. One or more of these fields may
be disabled, or automatically selected, as in the example image on the
right.
These options are based upon
users' input into the Parts Database. One or more of these fields may
be disabled, or automatically selected, as in the example image on the
right.
Automode will consider circuit limits when adding devices.
Freeze will prevent devices from connecting to the circuit.
Worst Case will cause Battery and Pass-through calculations to use rated amps.
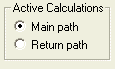 Once again, user-input to
the Parts Database drives whether this option is active or read-only.
Circuit type and wiring style will cause the dialog box to be read-only
or user-editable. In the large image at the top, it is read-only, and
active calculations will be performed on the main circuit path. In the
image to the right, it is shown as editable.
Once again, user-input to
the Parts Database drives whether this option is active or read-only.
Circuit type and wiring style will cause the dialog box to be read-only
or user-editable. In the large image at the top, it is read-only, and
active calculations will be performed on the main circuit path. In the
image to the right, it is shown as editable.
For more information to define uniform Calculation standards for a drawing, click here.
 The Circuit Information list
dialog box is a useful summary to ensure the circuit and its connected
appliances are operating within acceptable voltage limits.
The Circuit Information list
dialog box is a useful summary to ensure the circuit and its connected
appliances are operating within acceptable voltage limits.
Data includes the circuit's calculation method that is used, such as Alarm, SLC, etc.
Additionally, the total current load, voltage drop and voltage drop percentage are displayed.
Scroll down to view wire capacitance information.
If all voltage and current loads are within acceptable ranges, the messages Total current load within acceptable limit and All appliances operating within acceptable voltage range will display. If not, warnings will appear to notify users of unacceptable values.
Lastly, the length mode used for calculations is displayed, and is based upon running total length or lump-sum length. For additional information on settings and calculation methods, click here.
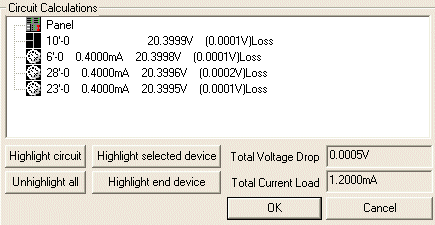 Within the Circuit Calculations
dialog, the Control Panel is listed first, followed by its circuits and
appliances in descending proximity to the Control Panel.
Within the Circuit Calculations
dialog, the Control Panel is listed first, followed by its circuits and
appliances in descending proximity to the Control Panel.
The Circuit Calculations dialog box displays the individual circuit's and appliance's Amperage/ Wattage, Voltage, and Voltage Drops. For reference, the Total Voltage Drop (also listed in the Circuit Information list) displays in the lower right corner, along with the Total Current Load.
To highlight an individual circuit or appliance used in the circuit calculations, highlight the row in the Circuit Calculations list dialog, then click on the corresponding Highlight circuit or Highlight selected device button.
Unhighlight all will de-select all circuits and appliances used in the calculations.
Highlight end device will highlight the path's end device in the drawing.
Alternatively, double-click the row in the Circuit Calculations list and the appliance or circuit will be highlighted in the drawing.
Default Properties: Appliance Page
Design Standards: Calculations Page
Design Standards: Circuits Page
Fire Control Panel Properties Page
Parts Database: Modify Existing Item
![]()