![]()
Users can access appliances' default properties pages directly from the Settings menu/Default Properties submenu. Click the appliance on the left to be routed directly to its Default Properties page.
As new appliances are added to a drawing, their initial properties can be accessed by double-clicking the appliance in the drawing. Alternatively, users can highlight the appliance in the drawing, right-mouse click the appliance, then choose Properties from the pop-up menu. Properties of AlarmCAD for AutoCAD appliances include various characteristics such as appliance material, circuits required/provided, cost, symbol, colors and layer. A new layer is created each time a new appliance is added to the drawing.
The appliance's Main Properties Page (or Tab) lists characteristics and settings specific to the appliance. For example, its part number, type, category, subcategory, size, and symbol layer are listed on this page.
To learn more about the other pages comprising each appliance's Default Properties, click on the link below.
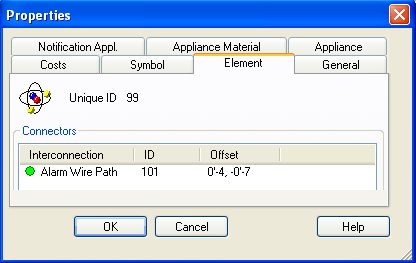 The Element
Tab (page pictured right) provides the appliance's unique identification
number, its connectors (appliances connected to it) and their unique identification
numbers, and offset coordinates (between the device and the connector).
The Element
Tab (page pictured right) provides the appliance's unique identification
number, its connectors (appliances connected to it) and their unique identification
numbers, and offset coordinates (between the device and the connector).
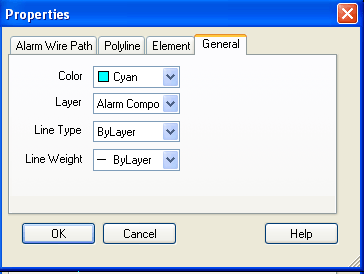 The General
Page (pictured right) displays the appliance's color, layer, line
type, and line weight.
The General
Page (pictured right) displays the appliance's color, layer, line
type, and line weight.
Change the appliance's color from the drop down menu, or create a custom color using the palette.
Move the appliance to another Layer by choosing another one from the drop-down menu.
Define the appliance's Line Type and Weight by choosing from the corresponding drop-down menus.
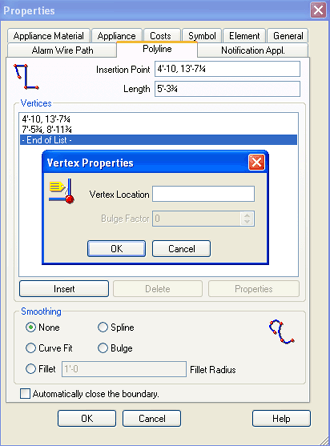 AlarmCAD for AutoCAD's
line based appliances, such as wire paths, have a Polyline
Page (or Tab) on their properties
dialog, which is pictured on the right.
AlarmCAD for AutoCAD's
line based appliances, such as wire paths, have a Polyline
Page (or Tab) on their properties
dialog, which is pictured on the right.
The appliance's X and Y coordinates of its Insertion Point and Length (distance from origin to the termination of the line) are listed first, then its vertices.
To insert an additional Vertex, click the Insert button, and the Vertex Properties dialog box appears (center of right image). Enter a Vertex Location, and Bulge Factor, if desired.
At the bottom of the Polyline page is the Smoothing dialog box. By default, 'None' is selected, but 'Spline,' 'Curve Fit,' 'Bulge,' or 'Fillet' can be selected instead. Specify a Fillet Radius, if desired by inserting a value into the editable field.
"Automatically close the boundary" is not turned on by default; check the option box to automatically close the polyline's boundary.
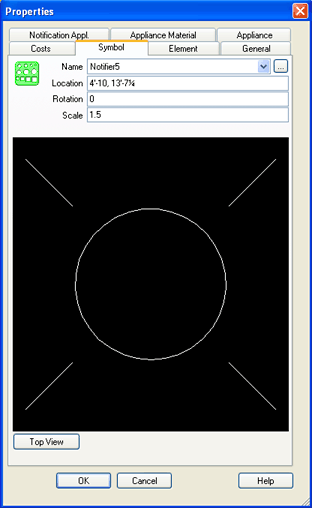 The Symbol
Page (image right) displays the symbol's Name, Coordinate Location,
Rotation Angle, and Scale. Additionally, each available symbol is pictured
on the bottom two-thirds of the dialog.
The Symbol
Page (image right) displays the symbol's Name, Coordinate Location,
Rotation Angle, and Scale. Additionally, each available symbol is pictured
on the bottom two-thirds of the dialog.
If desired, choose another symbol from the Name drop-down menu. Click the browse button to search for another .sym file from the program files. Change the symbol's Location, Rotation and/or Scale by inserting another value in the corresponding field.
Change the symbol's view, which defaults to Top View, by left-mouse clicking within the picture, holding the left mouse, then rotating the symbol to another angle. Return the symbol to top view by clicking the corresponding button in the lower left side of the dialog.
![]()